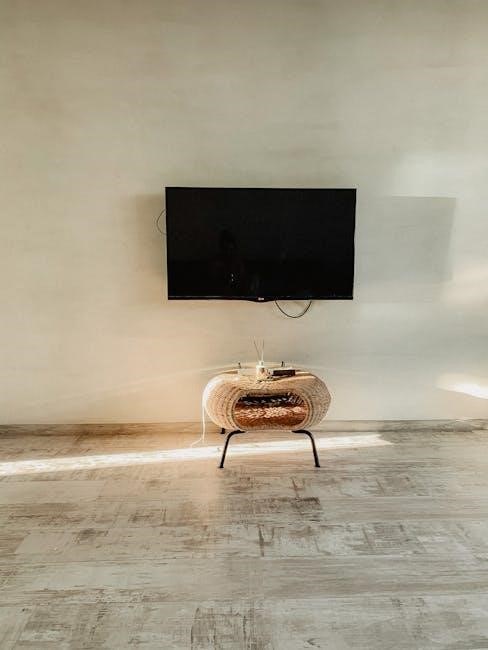
Welcome to the Perlesmith TV wall mount instructions! This guide provides a comprehensive walkthrough for installing your TV mount safely and effectively. With clear instructions and compatibility for various TV sizes, Perlesmith mounts offer a reliable solution for home, campervan, or RV setups. Follow along to ensure proper installation and optimal viewing experience.
1.1 Overview of Perlesmith TV Wall Mounts
Perlesmith TV wall mounts are versatile, durable, and designed for ease of use. They cater to various TV sizes and types, offering fixed, tilt, swivel, and full-motion options. Known for their sturdy construction and compatibility with different VESA patterns, these mounts provide secure and stable support for your TV. They are ideal for home, campervan, or RV installations, ensuring optimal viewing angles and flexibility.
1.2 Importance of Proper Installation
Proper installation is crucial for ensuring the safety, stability, and functionality of your Perlesmith TV wall mount. Incorrect installation can lead to uneven mounting, reduced durability, or even damage to your TV. Following the instructions carefully ensures a secure setup, optimal viewing angles, and prevents potential hazards. It also guarantees the mount’s longevity and performance, delivering the best viewing experience for years to come.

Unboxing and Preparation
Start by unboxing the Perlesmith TV wall mount, ensuring all components are included. Prepare your TV and wall by checking VESA compatibility and wall type for a smooth installation process.
2.1 What’s Included in the Package
The Perlesmith TV wall mount package includes the mounting bracket, wall plate, screws, spacers, and detailed instructions. Additional hardware like bolts and washers may be provided for secure installation. Ensure all components are accounted for before starting the installation process to avoid delays and ensure compatibility with your TV and wall type;
2.2 Preparing Your TV and Wall
Before installation, ensure your TV and wall are prepared. Check your TV’s weight and VESA pattern to confirm compatibility with the mount. Locate wall studs and ensure the surface is sturdy. Gather necessary tools like a drill, level, and screwdrivers; Clean the area and remove any obstructions. Double-check all components and instructions to streamline the process and avoid delays.

Step-by-Step Installation Guide
Follow this detailed guide to install your Perlesmith TV mount securely. Start by mounting the wall plate, then attach the TV bracket, and finally hang the TV. Ensure all steps are completed methodically for a stable and level installation, using the provided hardware and instructions for optimal results and safety.
3.1 Mounting the Wall Plate
Begin by locating the wall studs using a stud finder. Mark the mounting points on the wall, ensuring they are level. Attach the wall plate using the provided screws and washers. For drywall, use large screws to secure the plate firmly. If mounting on a metal stud, ensure screws are tightly fastened. Double-check the plate’s alignment and stability before proceeding.
3.2 Attaching the TV Bracket
Align the TV bracket with the back of your television, ensuring it matches the VESA pattern. Secure the bracket using the provided screws, tightening firmly but avoiding overtightening. For tilt or swivel models, attach the arms to the bracket and adjust as needed. Ensure all connections are snug and verify the TV’s compatibility with the mount before hanging it on the wall plate.
3.3 Hanging the TV on the Wall Mount
Carefully lift the TV and align the bracket hooks with the wall plate. Gently lower the TV onto the mount, ensuring it clicks securely into place. Tighten the locking screws to hold the TV firmly. Double-check the TV’s stability and ensure it is level. Verify that the weight and VESA pattern match the mount’s specifications for a safe and secure installation.
3.4 Adjusting the TV Position
Loosen the tilt and swivel screws to adjust the TV’s angle and orientation. Gently tilt the TV forward or backward and swivel it left or right for optimal viewing. Ensure the TV is level and securely locked in place after adjustments. Refer to the manual for specific tilt and swivel limits to maintain stability and prevent damage.
Campervan and RV Installation Tips
Mounting a TV in a campervan or RV requires careful planning. Ensure the mount is sturdy and suitable for mobile use. Choose a model designed for vehicles to handle motion and vibrations, ensuring your TV stays secure and level during travel.
4.1 Choosing the Right Mount for Your Vehicle
Selecting the right mount for your campervan or RV is crucial. Ensure the mount is designed for mobile use, with sturdy construction to handle vibrations. Check weight limits and VESA compatibility to match your TV. Consider space constraints and choose a model with adjustable features for optimal viewing angles on the go.
4.2 Special Considerations for Mobile Use
For campervan or RV installations, consider vibration resistance and sturdy mounting hardware. Ensure the mount is securely fastened to withstand movement. Choose models with locking mechanisms to prevent shifting during travel. Verify weight limits and ensure proper ventilation to avoid overheating. Always test stability before driving and secure loose cables to prevent damage.
Safety Precautions and Best Practices
Always adhere to weight limits and ensure proper installation to prevent accidents. Use sturdy hardware and double-check connections for stability. Follow manual guidelines carefully and test the mount’s security before use.
5.1 Weight Limits and TV Compatibility
Ensure your TV’s weight does not exceed the mount’s capacity, typically supporting 32-55 inch TVs. Verify VESA patterns match for compatibility. Always check your TV’s specifications and the mount’s weight limits to guarantee safe installation.
5.2 Ensuring Stability and Security
Ensuring your Perlesmith TV mount is securely installed is crucial for stability and safety. Follow the clear instructions to properly align and fasten all components. Tighten screws firmly to prevent any wobbling. For optimal results, mount on a flat wall and ensure all connections are secure. Double-checking your setup guarantees a stable and safe viewing experience.

Understanding VESA Patterns and Compatibility
VESA (Video Electronics Standards Association) patterns define the mounting hole configurations on TVs. Ensure your Perlesmith mount matches your TV’s VESA pattern for proper compatibility and secure installation.
6.1 What is VESA and Why It Matters
VESA (Video Electronics Standards Association) defines the mounting hole patterns on the back of TVs. These patterns determine compatibility with wall mounts, ensuring a proper and secure fit. Understanding VESA standards is crucial for selecting the right mount and avoiding installation issues. Compatibility ensures stability, prevents damage, and guarantees optimal viewing angles for your TV setup.
6.2 Checking Your TV’s VESA Compatibility
To ensure compatibility, measure the distance between your TV’s mounting holes horizontally and vertically. Check your TV’s manual or manufacturer’s website for VESA pattern details. Common sizes range from 200x200mm to 600x400mm. Verify these dimensions against your Perlesmith mount’s specifications to guarantee a secure and proper fit, ensuring stability and optimal performance for your setup.
Soundbar and Additional Device Compatibility
Perlesmith TV mounts offer compatibility with soundbars and extra devices, enhancing your entertainment setup. The MI-SB39 soundbar mount allows easy installation, ensuring seamless integration with your TV for optimal audio-visual experience.
7.1 Mounting Soundbars with Your TV
The Perlesmith MI-SB39 soundbar mount is designed to complement your TV wall mount, offering a seamless way to attach your soundbar. Compatible with most TV sizes, it ensures optimal audio alignment with your screen. Easy to install, it securely holds your soundbar in place, enhancing your home theater setup while maintaining a sleek, organized appearance for the best viewing experience.
7.2 Integrating Other Accessories
Perlesmith TV wall mounts support seamless integration of additional accessories like soundbars, cable boxes, and gaming consoles. Use the MI-SB39 soundbar mount for optimal audio alignment or attach other devices using compatible brackets. Ensure all cables are securely managed for a clean setup. This enhances your entertainment system while maintaining stability and a sleek appearance, perfect for a modern home theater experience;
Tilt, Swivel, and Adjustable Features
Perlesmith mounts offer tilt, swivel, and pitch adjustments for optimal viewing angles. Easily customize your TV’s position to reduce glare or accommodate different seating arrangements. Adjustments are smooth and secure, ensuring stability while enhancing your viewing experience. Customers praise the ease of tilting and swiveling, making it ideal for various setups.
To adjust the tilt and pitch, loosen the screws on the mounting bracket. Gently tilt the TV forward or backward to achieve your desired angle. For pitch adjustments, slide the TV up or down on the mount. Ensure the TV is level and secure after adjustments. Refer to your TV’s manual for specific tilt and pitch recommendations to optimize your viewing experience.
8.2 Using the Swivel Function for Optimal Viewing
8.1 How to Adjust the Tilt and Pitch
To adjust the tilt, loosen the screws on the mounting bracket and gently tilt the TV forward or backward. For pitch adjustments, slide the TV up or down on the mount. Ensure the TV is level and secure after adjustments. Refer to your TV’s manual for specific tilt and pitch recommendations to optimize your viewing experience.
Assembly and Hardware Tips
Assemble the mount carefully using the provided hardware. Ensure all screws are tightened securely for stability. Use a level to align the wall plate and TV bracket properly for a safe and durable installation.
9.1 Assembling the Mounting Hardware
Start by carefully reviewing the installation manual to identify all hardware components. Use the provided Allen wrench and screws to assemble the mounting brackets. Sort and organize the hardware to ensure compatibility with your TV’s VESA pattern. Attach the wall plate to the mount, ensuring proper alignment. Tighten all screws gradually to avoid misalignment. Double-check with a level for accuracy.
9.2 Tips for Securing the Hardware Properly
Ensure all screws are tightened evenly to prevent wobbling. Use the provided Allen wrench for secure fastening. Double-check the alignment with a level before final tightening. Avoid overtightening, which may damage the wall or hardware. Verify VESA compatibility with your TV for a snug fit. Consult the manual for specific torque recommendations to ensure stability and safety.
Troubleshooting Common Issues
Address stability or alignment issues by checking hardware tightness and wall anchor placement. Use a level to ensure proper alignment. Consult the manual for solutions to common problems like wobbling or uneven mounting. Ensure all screws are securely fastened without overtightening.
10.1 Resolving Stability Problems
Stability issues often arise from loose hardware or improper wall anchor placement. Ensure all screws are tightened firmly and anchors are securely fixed. Check the weight limit to confirm it matches your TV. For added stability, use a spirit level to align the mount properly during installation. This ensures your TV remains steady and secure.
10.2 Fixing Misalignment or Leveling Issues
To address misalignment or leveling problems, start by ensuring the wall plate is perfectly horizontal using a spirit level. Double-check that the TV bracket aligns properly with the wall plate and that all screws are tightened evenly. If the mount allows adjustments, fine-tune the tilt and swivel functions to achieve proper alignment. Consult the manual for specific guidance and verify that the weight limit isn’t exceeded to maintain stability.
Customer Reviews and Feedback Insights
Customers praise the Perlesmith TV mounts for ease of installation and clear instructions, highlighting their functionality and value for money. Mixed opinions exist on size, but overall satisfaction is high.
11.1 Common Praise for the Product
Customers frequently commend the Perlesmith TV mounts for their ease of installation and clear instructions, which simplify the process for users of all skill levels. Many highlight the sturdy build and compatibility with various TV sizes, ensuring a secure and stable setup. The mounts’ tilt and swivel features are particularly praised for enhancing viewing flexibility. Overall, the product is widely regarded as a great value for money.
11.2 Areas for Improvement Noted by Users
Some users have noted that the Perlesmith TV mounts can feel bulky, with mixed opinions on size suitability for smaller spaces. A few customers mentioned the lack of a built-in spirit level, which could streamline installation. Additionally, there have been suggestions for including more detailed instructions for advanced features and ensuring all necessary hardware is consistently provided in the package.
Congratulations on successfully installing your Perlesmith TV mount! Proper installation ensures safety and optimal viewing. Follow maintenance tips for longevity and enjoy your enhanced viewing experience.
12.1 Summary of Key Installation Points
Ensure your TV mount is installed safely and correctly by following the manual instructions. Verify VESA compatibility, use appropriate hardware, and test stability before finalizing. Proper installation guarantees a secure and perfectly aligned TV, enhancing your viewing experience while preventing potential risks.
12.2 Maintenance and Long-Term Care
Regularly inspect the mount’s hardware for tightness and wear. Clean the mount and TV surface to prevent dust buildup. Check compatibility if upgrading your TV. Ensure stability and adjust as needed. For major adjustments, consult the manual or seek professional help to maintain optimal performance and safety over time.