Installing a chain link fence is a straightforward process that requires careful planning and preparation. This guide covers the essential tools‚ materials‚ and steps to ensure a successful installation‚ emphasizing proper techniques for safety and durability.
1.1 Benefits of Chain Link Fences
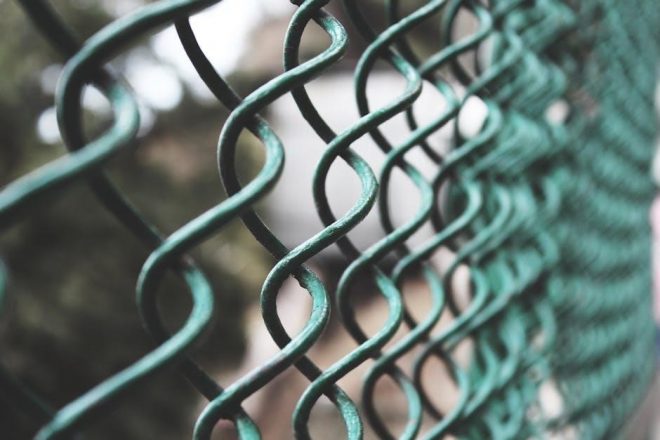
Chain link fences are a popular choice due to their affordability‚ durability‚ and ease of installation. They provide clear visibility‚ making them ideal for residential‚ commercial‚ or industrial use. With minimal upkeep required‚ these fences are a practical solution for securing properties while maintaining a clean‚ modern appearance. Their versatility and long-lasting performance make them a cost-effective option for various settings.
1.2 Importance of Proper Installation
Proper installation of a chain link fence ensures safety‚ durability‚ and structural integrity. Correct techniques prevent sagging‚ unevenness‚ and damage from environmental stress. It also guarantees compliance with local building codes and regulations. A well-installed fence enhances security and longevity‚ avoiding costly repairs and potential safety hazards over time.
Planning and Preparation
Planning involves obtaining permits‚ measuring property lines‚ and layout design. Proper preparation ensures compliance with local regulations and a well-organized installation process.
2.1 Obtaining Necessary Permits and Approvals
Before starting‚ ensure you have all required permits and approvals. Check local zoning laws‚ property line setbacks‚ and underground utility locations. Secure permits for height and type of fence. Failure to comply may result in fines or removal of the fence. Contact local authorities to confirm regulations and avoid delays in your installation process.
2.2 Measuring and Marking the Property Line
Accurately measure your property line to determine the fence layout. Use a tape measure or surveyor’s tools to mark boundaries. Spray paint or stakes can help visualize the fence line. Ensure the fence does not encroach on neighboring properties. Double-check utility locations to avoid underground cables or pipelines. Proper marking ensures compliance with local regulations and prevents installation errors.
Tools and Materials Needed
Essential tools include a post-hole digger‚ shovel‚ concrete‚ wire cutter‚ and pliers. Materials needed are chain link fabric‚ fence posts‚ tension bands‚ and hardware.
3.1 Essential Tools for Installation
The essential tools for chain link fence installation include a post-hole digger‚ shovel‚ concrete mixer‚ pliers‚ wire cutter‚ fence puller‚ spirit level‚ measuring tape‚ and safety gear. These tools ensure proper digging‚ setting posts‚ tightening fabric‚ and maintaining safety throughout the process.
3.2 Required Materials for Chain Link Fence
The materials needed include chain link fabric‚ fence posts‚ concrete‚ tension bands‚ tie wire‚ rail‚ and fittings. These components ensure the structural integrity and security of the fence‚ providing durability and stability over time.
Installing Fence Posts
Installing fence posts involves digging holes‚ setting corner posts‚ and spacing line posts evenly. Concrete is used to secure posts‚ ensuring stability and proper alignment for the fence.
4.1 Digging Post Holes and Setting Corner Posts
Dig post holes 12 inches deep and 18 inches wide for corner and gate posts. Pour concrete to secure posts‚ ensuring they are level and plumb. Use a tamping tool to pack soil and concrete around posts for stability. Properly aligned corner posts are crucial for the structural integrity of the fence‚ ensuring even spacing and alignment of subsequent posts.
4.2 Spacing and Aligning Line Posts
Space line posts 10–15 feet apart‚ depending on fence height and local building codes. Use a string and level to ensure alignment. Dig holes 12 inches deep and 6 inches wide for each post. Pour concrete around the base and let it set. Check alignment regularly to maintain uniformity. Proper spacing ensures structural integrity and prevents sagging of the chain link fabric.
Attaching Fabric and Hardware
Attach chain link fabric to posts using wire ties or tension bands. Ensure fabric is tight and evenly spaced. Secure hardware properly for stability and security.
5.1 Hanging the Chain Link Fabric
Start by attaching the chain link fabric to terminal posts using tension bands and wire ties. Ensure the fabric is evenly spaced and aligned. Begin at one corner‚ threading the fabric through the posts. Use wire ties to secure it tightly. Maintain tension to prevent sagging. Properly aligning the fabric ensures structural integrity and a clean appearance.
5.2 Securing Tension Bands and Wire
After hanging the fabric‚ secure tension bands tightly around terminal posts using bolts. Wrap the wire tightly around the bands‚ ensuring no slack. Tighten evenly to maintain fabric tension. Properly securing these components prevents sagging and ensures the fence remains stable and secure over time.
Stretching the Fence
Use a fence puller to secure the stretcher bar to the end post and tighten the mesh. Crank the tool to achieve proper tension‚ ensuring the fabric is taut and evenly aligned for durability and stability.
6.1 Using a Fence Puller for Tightening
Attach the fence puller to the stretcher bar and the end post. Crank the tool slowly to tighten the mesh‚ ensuring even tension. Check tightness by squeezing the fabric; it should compress about 2-4 cm. Avoid over-tightening‚ as this can damage the fence. Proper use of the puller ensures a uniform and secure installation‚ preventing sagging and enhancing durability.
6.2 Ensuring Proper Tension and Alignment
After tightening‚ inspect the fence for proper tension and alignment. Ensure the fabric is evenly stretched and aligned with the posts. Check that all connections are secure and the mesh is tight but not over-tensioned. Verify that corner and gate posts are straight and properly aligned. Regularly inspect and adjust the tension to maintain the fence’s structural integrity and prevent sagging or misalignment.

Installing Gates
Installing gates involves measuring and fitting gate posts‚ attaching hardware‚ and ensuring proper alignment. A well-installed gate ensures security and durability for your fence.
7.1 Measuring and Fitting Gate Posts
Measure the gate width and mark post locations accurately. Dig holes for gate posts‚ ensuring they are level and aligned with the fence. Set posts in concrete‚ leaving enough space for hinges and latches. Ensure posts are secure and properly spaced to support the gate’s weight and function. Proper fitting ensures smooth operation and durability.
7.2 Attaching Gate Hardware and Hinges
Attach hinges to the gate frame and align them with marks on the gate posts. Secure hinges using bolts‚ ensuring tightness for stability. Install latches at a comfortable height‚ aligning them with catches on posts. Adjust tension and test functionality. Ensure smooth operation and security by properly fitting all hardware; Double-check alignment and tighten as needed for optimal performance.
Adding Security Measures
Enhance fence security with barbed wire or anti-climb spikes. Install tension wires at the top for added protection. Use high-quality locks and consider surveillance integration for maximum safety.
8.1 Installing Barbed Wire for Enhanced Security
Barbed wire enhances security by deterring climbers. Wrap it around the fence top‚ spacing strands 3-4 inches apart. Attach using heavy-duty wire or clips. Ensure proper tension to prevent sagging. Be cautious near vegetation to avoid damage. This adds an effective layer of protection while maintaining the fence’s structural integrity and visibility.
8.2 Tips for Deterrents Against Climbing
Install anti-climb spikes or curved fence toppers to discourage scaling. Apply slippery coatings like PVC or silicone to posts and rails. Ensure the fence height meets local regulations‚ typically 6 feet for residential areas. Trim nearby trees and shrubs to reduce climbing aids. Regular inspections help maintain security features and prevent damage‚ ensuring long-term effectiveness.
Final Inspection and Touch-ups
Inspect all connections for tightness and alignment. Apply protective coatings to exposed metal. Ensure the fence is secure‚ properly aligned‚ and free from damage for lasting durability.
9.1 Checking for Loose Connections
Inspect all posts‚ tension bands‚ and bolts for tightness. Ensure no hardware is loose or misaligned. Check the chain link fabric for proper attachment to posts and tension bands. Tighten any loose connections to maintain stability and prevent sagging or damage over time. This step ensures the fence remains secure and visually appealing for years to come.
9.2 Applying Protective Coatings
Apply rust-resistant or waterproof coatings to metal components to protect against corrosion. Use high-quality paints or galvanized treatments for long-lasting durability. Ensure all surfaces are clean and dry before application. Follow the manufacturer’s instructions for optimal results. Protective coatings enhance the fence’s lifespan and maintain its appearance‚ ensuring it withstands environmental elements effectively.
Maintenance and Repair
Regular inspection ensures durability and safety. Clean the fence with a wire brush to remove dirt and rust. Replace damaged sections promptly to maintain structural integrity and appearance.
10.1 Regular Inspection and Cleaning
Regularly inspect the fence for rust‚ sagging‚ or damage. Clean with a wire brush to remove dirt and debris. Check for loose connections or worn hardware. Addressing issues promptly prevents further deterioration and ensures the fence remains secure and visually appealing. Neglecting maintenance can lead to costly repairs and reduce the fence’s lifespan. Timely cleaning and inspections are essential for longevity.
10.2 Repairing Damaged Sections
Inspect damaged areas and clear debris. Replace torn or corroded fabric sections‚ ensuring tight connections. Tighten loose wires or hardware with pliers or wrenches. For severe damage‚ cut out the affected portion and weave in new mesh. Apply rust-resistant coatings to repaired areas to prevent further deterioration. Regular repairs maintain the fence’s structural integrity and extend its lifespan‚ ensuring safety and security.
Cost Estimation and Budgeting
Estimate costs by calculating material prices‚ labor fees‚ and local regulations. Factors like fence height‚ mesh size‚ and post thickness impact expenses. Contact suppliers and contractors for accurate quotes to create a detailed budget plan.
11.1 Calculating Material Costs
Calculate material costs by measuring the fence perimeter and determining the quantity of chain link fabric‚ posts‚ rails‚ and hardware needed. Costs vary based on wire gauge‚ mesh size‚ and post type. Include expenses for concrete‚ tension wire‚ and fittings. Use supplier quotes to sum up the total material expenses for an accurate budget breakdown;
11.2 Labor Costs for Professional Installation
Labor costs for professional installation vary based on fence height‚ complexity‚ and location. On average‚ installers charge $10 to $20 per linear foot. Taller fences or complex layouts may increase rates. Ensure to request detailed quotes‚ including materials and labor‚ to avoid hidden charges. Additional costs may apply for gates‚ security features‚ or site preparation.

Downloadable PDF Guide
Access a comprehensive PDF guide detailing every step of chain link fence installation‚ from planning to final touches‚ complete with diagrams for easy reference and printing.
12.1 Accessing the Complete Installation Manual
The complete installation manual is available for download as a PDF‚ providing detailed‚ step-by-step instructions and diagrams. It covers everything from planning and material selection to final installation steps. Users can easily print the guide for on-site reference‚ ensuring accuracy and convenience during the installation process. Access the manual directly from trusted sources online.
12.2 Printing and Using the Guide
Print the PDF guide on standard-sized paper for easy reference. Ensure all pages are included and properly ordered. Use the guide alongside your tools and materials to follow each step accurately. The printed version allows for on-site consultation‚ making the installation process smoother and more efficient. Keep it handy to cross-check details and ensure a flawless chain link fence setup.