samsung washing machine dc68 manual

Samsung Washing Machine DC68 Manual: A Comprehensive Guide

Navigating Samsung’s DC68 washing machine requires understanding its features, operations, and maintenance—this manual provides detailed guidance for optimal performance and longevity.

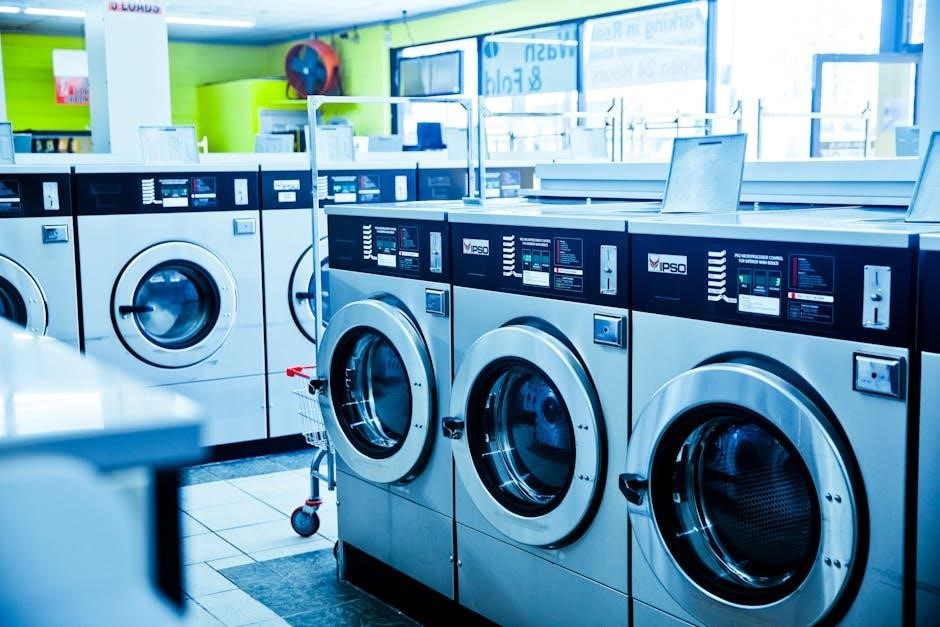
Welcome to the Samsung DC68 washing machine experience! This manual serves as your comprehensive resource for understanding and utilizing all the features of your new appliance. The DC68 series is designed to deliver powerful cleaning performance with a focus on efficiency and convenience. Before first use, carefully review the safety precautions outlined within this guide to ensure safe operation and prevent potential issues.

This introduction will familiarize you with the machine’s core functionalities and prepare you for detailed instructions on operation, maintenance, and troubleshooting. We’ll cover everything from loading laundry correctly to interpreting the control panel indicators. Proper understanding of these elements will maximize the lifespan and effectiveness of your Samsung DC68 washing machine.

Understanding the DC68 Model Series

The Samsung DC68 washing machine series encompasses several variations designed to meet diverse laundry needs. While sharing a core set of features, models within the DC68 range may differ in capacity, specific wash programs, and aesthetic finishes. This manual aims to provide general guidance applicable to most DC68 models, but always refer to the specific model number on your appliance for precise details.

Key distinctions between sub-models often relate to spin speeds, energy efficiency ratings, and the inclusion of advanced features like steam cleaning or self-diagnosis. Understanding these nuances will help you optimize your washing experience and select the most appropriate settings for each load. Consult Samsung’s official website for a detailed comparison of all DC68 variants.

Key Features and Specifications

The DC68 boasts diverse wash programs, efficient energy consumption, and a robust build, offering a blend of performance and convenience for modern laundry demands.

Capacity and Dimensions of the DC68

Understanding the DC68’s capacity and dimensions is crucial for optimal installation and laundry handling. This model typically offers a generous drum capacity, commonly ranging from 8 to 10 kilograms, accommodating family-sized loads effectively.

Regarding physical dimensions, the DC68 generally measures approximately 600mm in width, 600mm in depth, and 850mm in height. However, slight variations may exist depending on the specific sub-model.

Before purchasing, carefully measure the intended installation space to ensure a proper fit, allowing for adequate ventilation and connections. Considering these specifications will guarantee seamless integration into your laundry room and maximize the machine’s usability.

Wash Programs Available on the DC68

The Samsung DC68 washing machine boasts a diverse range of wash programs designed to cater to various fabric types and cleaning needs; Standard programs include Cotton, Synthetics, Delicates, and Wool, ensuring gentle care for sensitive items.

Specialized cycles like Quick Wash offer rapid cleaning for lightly soiled loads, while Intensive Wash tackles stubborn stains effectively. A dedicated Eco Wash program minimizes energy and water consumption, promoting sustainability.

Furthermore, the DC68 often features options like Bedding, Baby Care, and Outdoor care, providing tailored solutions for specific laundry challenges. These programs optimize washing parameters for superior results and fabric protection.

Energy Efficiency and Water Consumption

The Samsung DC68 washing machine is engineered for optimal energy efficiency, typically earning a high energy rating. This translates to lower electricity bills and a reduced environmental impact. Water consumption is also carefully managed, with the machine utilizing sensors and algorithms to determine the precise amount of water needed for each load.

The Eco Wash program further minimizes both energy and water usage, offering a sustainable cleaning solution.

Users can monitor estimated energy and water consumption per cycle via the display panel, promoting conscious laundry habits.

Operating Instructions

Proper operation of the DC68 involves preparing loads, selecting cycles, dispensing detergent, and utilizing the control panel for customized washing experiences.

Preparing the Washing Machine for Use

Before the initial use of your Samsung DC68 washing machine, several crucial steps ensure optimal performance and prevent potential issues. First, carefully remove all shipping bolts and packaging materials from the drum and the machine’s exterior. These are vital for transport stability but must be removed for proper operation.

Next, position the washing machine on a level surface; adjust the leveling feet as needed to eliminate any wobble. Connect the water inlet hoses securely to both the machine and the water supply, ensuring tight connections to prevent leaks. Finally, connect the drain hose properly, verifying it’s positioned to facilitate efficient water drainage. A preliminary empty wash cycle, using a small amount of detergent, is recommended to clean the drum before loading laundry.

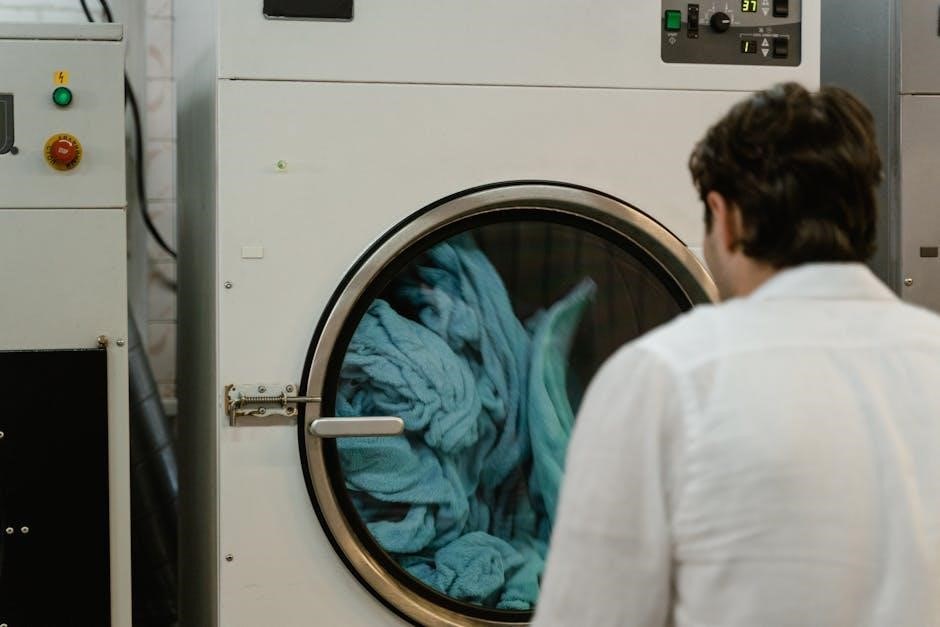
Loading Laundry Correctly

Proper laundry loading is essential for effective cleaning and to prevent damage to both your clothes and the Samsung DC68 washing machine. Avoid overloading the drum; consult the machine’s capacity guidelines to ensure sufficient space for items to move freely during the wash cycle.

Distribute the laundry evenly within the drum to maintain balance and minimize vibration. Separate delicate items and place them in a mesh laundry bag for added protection. Ensure that pockets are empty and that loose items, like belts or coins, are removed. Do not wrap items around the drum, and avoid forcing large or bulky items into the machine.

Selecting the Appropriate Wash Cycle

The Samsung DC68 offers a variety of wash cycles tailored to different fabric types and soil levels. Carefully review the garment care labels before selecting a cycle. For everyday cottons, use the ‘Cotton’ cycle. Delicates require the ‘Delicate’ or ‘Hand Wash’ cycle, utilizing a gentler wash action.

Heavily soiled items benefit from the ‘Intensive’ cycle, while a ‘Quick Wash’ is suitable for lightly soiled clothes needing a fast refresh. Utilize the ‘Bedding’ cycle for bulky items like duvets and sheets. Always consider the fabric composition and desired wash intensity when choosing the optimal cycle for your laundry load.

Using Detergent and Fabric Softener

Proper detergent usage is crucial for optimal cleaning performance with your Samsung DC68. Always use a high-efficiency (HE) detergent, as standard detergents can create excessive suds. Refer to the detergent packaging for recommended dosage based on load size and soil level. Pour detergent into the designated dispenser drawer, avoiding direct contact with clothes.

Fabric softener should be added to the separate fabric softener compartment. Never pour fabric softener directly onto clothes, as it can cause staining. Overuse of detergent or fabric softener can leave residue on clothes and within the machine; follow the manufacturer’s guidelines carefully for best results.

Control Panel Overview

The DC68’s control panel features intuitive buttons and a clear display, enabling easy selection of wash cycles, options, and monitoring of the washing process.

Display Panel Indicators and Symbols

The Samsung DC68 washing machine’s display panel utilizes a variety of indicators and symbols to communicate the machine’s status and selected settings. A lit power indicator confirms the machine is receiving electricity. Cycle status is shown through a progress bar, visually representing the remaining wash time.

Symbols denote specific wash cycle selections – delicate, normal, quick wash, and others. Error codes, displayed as alphanumeric combinations (like “E2” or “4E”), signal potential issues requiring attention. Water temperature settings are indicated by icons representing cold, warm, and hot water.

Additional symbols alert users to options like delay start, extra rinse, or child lock activation. Understanding these indicators is crucial for effective operation and troubleshooting. Refer to the full manual for a complete decoding of all symbols.

Button Functions Explained

The Samsung DC68’s control panel features clearly labeled buttons for intuitive operation. The ‘Power’ button initiates or terminates the machine’s operation. ‘Start/Pause’ begins the selected cycle or temporarily halts it for adding garments. Cycle selection buttons allow choosing pre-programmed wash cycles like ‘Delicates’ or ‘Heavy Duty’.

‘Temperature’ adjusts the water heating level, offering options for cold, warm, or hot washes. ‘Spin Speed’ controls the final spin cycle intensity, impacting moisture retention. ‘Options’ accesses additional settings like ‘Pre-soak’ or ‘Extra Rinse’.

The ‘Delay End’ button schedules the cycle to start at a later time. Understanding each button’s function ensures precise control over your laundry process.

Start/Pause and Option Buttons

The ‘Start/Pause’ button on the DC68 is central to operation; pressing it initiates the selected wash cycle. During a cycle, a second press pauses operation, allowing for laundry adjustments like adding forgotten items. The ‘Option’ buttons unlock customized wash settings. These include ‘Soil Level’ for adjusting wash intensity, ‘Rinse+’ for extra rinsing, and ‘Spin Only’ for a dedicated spin cycle.

‘Time Remaining’ displays the estimated cycle duration; ‘Child Lock’ disables the control panel, preventing accidental operation.

Mastering these buttons provides full control over your laundry experience, ensuring optimal cleaning and garment care.

Maintenance and Troubleshooting

Regular cleaning and prompt issue resolution are vital for the DC68’s longevity and performance; this section details procedures for upkeep and common error solutions.

Cleaning the Drum and Seals

Maintaining a clean drum and seals is crucial for preventing mold, mildew, and unpleasant odors in your Samsung DC68 washing machine. Regularly, at least once a month, or more frequently with heavy use, perform a drum cleaning cycle. Utilize a washing machine cleaner specifically designed for front-load or top-load machines, following the product’s instructions carefully.

For the seals, particularly the rubber gasket around the door, wipe them down after each wash to remove any lingering moisture or detergent residue. Pay close attention to the folds and crevices where debris can accumulate. A solution of mild detergent and warm water works effectively. Inspect the seals for any signs of damage, such as cracks or tears, and replace them if necessary to prevent leaks.

Leaving the door slightly ajar after each wash allows for better ventilation, further reducing the risk of mold growth.

Filter Cleaning Procedures

Regularly cleaning the filter in your Samsung DC68 washing machine is vital for optimal performance and preventing drainage issues. The filter traps lint, hair, and small objects, and a clogged filter can lead to reduced water flow and potential damage. Locate the filter access panel, typically at the bottom front of the machine.

Before opening the panel, have a towel and shallow container ready to catch any residual water. Carefully unscrew the filter cap and remove the filter. Rinse the filter thoroughly under running water, removing all debris. Inspect the filter housing for any obstructions and clean it as needed.

Reinstall the filter securely and close the access panel; It’s recommended to clean the filter every 1-2 months, or more often if you wash heavily soiled items.

Troubleshooting Common Error Codes

The Samsung DC68 washing machine utilizes error codes to signal malfunctions, aiding in quick diagnosis and resolution. A common code, “4E” or “4E1”, indicates a water supply issue – check the inlet hose for kinks or obstructions and ensure the water tap is fully open. “5E” or “5E1” signals a drainage problem; inspect the drain hose for blockages and verify the drain pump filter is clear.

Error code “UE” suggests an unbalanced load. Pause the cycle, redistribute the laundry evenly within the drum, and restart. “LE” indicates a door lock failure – ensure the door is securely closed. If errors persist, consult the full error code list in the manual.

Dealing with Drainage Issues

Effective drainage is crucial for your Samsung DC68’s performance. If water isn’t draining, first check the drain hose for kinks, twists, or obstructions. Ensure it isn’t inserted too far into the drainpipe, restricting flow. Next, locate and carefully clean the drain pump filter – a common culprit for blockages, often containing lint, coins, or small items.

Always unplug the machine before accessing the filter. If the issue persists, inspect the drain pump itself for damage or debris. A clogged pump may require professional attention. Regularly cleaning the filter prevents future drainage problems and extends the machine’s lifespan.

Safety Precautions

Prioritize safety when using the DC68. Always disconnect power before maintenance, keep children supervised, and avoid flammable materials near the appliance for secure operation.

General Safety Guidelines

To ensure safe operation of your Samsung DC68 washing machine, adhere to these crucial guidelines. Always read all instructions before use, and retain this manual for future reference. Never allow children to operate or play near the appliance without strict adult supervision. Do not wash items that have been cleaned with flammable liquids, as they pose a fire hazard.

Inspect the power cord regularly for damage, and never operate the machine if the cord is compromised. Avoid overloading the washing machine, as this can cause damage and reduce performance. Ensure the machine is properly grounded to prevent electrical shock. Do not attempt to repair the appliance yourself; contact qualified service personnel for assistance. Always disconnect the power supply before cleaning or performing maintenance.

Electrical Safety Information

Prioritize electrical safety when using your Samsung DC68 washing machine. This appliance must be properly grounded to minimize the risk of electric shock. Never operate the machine with a damaged power cord or plug; replace them immediately. Avoid using extension cords or multi-outlet adapters, as they can overheat and create a fire hazard.

Ensure the voltage and frequency requirements match your household supply. Do not expose the electrical components to water or moisture. If the machine malfunctions or experiences an electrical issue, disconnect it from the power source and contact a qualified technician. Never attempt to disassemble or repair the electrical system yourself. Always unplug the machine before cleaning or performing maintenance.

Child Lock Feature and Usage

The Samsung DC68 washing machine features a Child Lock function for enhanced safety. This prevents unintended operation by disabling the control panel buttons. To activate, simultaneously press and hold the ‘Spin’ and ‘Delay Start’ buttons for a few seconds – a lock symbol will illuminate on the display.

When Child Lock is active, button presses will be ignored, protecting wash settings from accidental changes. To deactivate, repeat the process of pressing and holding the ‘Spin’ and ‘Delay Start’ buttons. This feature is crucial in households with young children, preventing potential hazards or unwanted program alterations. Always check the lock status before initiating a wash cycle.

Advanced Features

The DC68 boasts innovative features like Delay Start, Eco Mode for energy savings, and a Self-Diagnosis mode to quickly identify potential issues.

Delay Start Function

The Delay Start function on your Samsung DC68 washing machine allows you to conveniently schedule wash cycles to begin at a later time. This is particularly useful for taking advantage of off-peak electricity rates or ensuring laundry is finished when you return home. To utilize this feature, simply press the ‘Delay Start’ button on the control panel.

Each press typically increments the delay time in increments of one or more hours, displayed on the machine’s digital display. You can set a delay of up to 24 hours. Once the desired delay time is selected, press the ‘Start/Pause’ button to activate the function. The machine will then automatically begin the wash cycle at the programmed time. Remember to load the laundry and add detergent before setting the delay.

Eco Mode Operation

The Eco Mode on your Samsung DC68 washing machine is designed to minimize energy and water consumption during each wash cycle, contributing to both environmental sustainability and reduced utility bills. When activated, Eco Mode typically adjusts the wash temperature, spin speed, and soak time to optimize efficiency.

To engage Eco Mode, locate the corresponding button on the control panel – often indicated by a leaf or ‘Eco’ symbol – and press it before starting your wash. The machine will automatically adjust settings for an eco-friendly wash. While wash times may be slightly longer in Eco Mode, the savings in resources make it a valuable option for everyday laundry. Always check the load size to ensure optimal Eco Mode performance.

Self-Diagnosis Mode

The Samsung DC68 washing machine incorporates a Self-Diagnosis Mode, a valuable troubleshooting tool designed to identify potential issues without requiring a service call. This feature allows the machine to detect and display error codes, providing a preliminary assessment of the problem.

To activate Self-Diagnosis Mode, typically a combination of buttons needs to be pressed simultaneously – consult the full error code list in this manual. The display panel will then show a specific error code, which corresponds to a particular malfunction. Refer to the ‘Troubleshooting Common Error Codes’ section to decipher the code and attempt basic solutions. If the issue persists, note the error code when contacting Samsung Support for assistance.

Technical Specifications

Detailed electrical and physical parameters of the DC68, including voltage, frequency, water pressure, and overall dimensions, are outlined for reference.

Voltage and Frequency Requirements

The Samsung DC68 washing machine is engineered to operate efficiently within specific electrical parameters. It’s crucial to verify your household supply aligns with these requirements to prevent damage and ensure optimal performance. Typically, the DC68 model is designed for a standard voltage of 220-240V.

However, variations may exist depending on the region. The standard frequency requirement is 50Hz, common in most European and Asian countries. Operating the machine outside these specified ranges can lead to malfunctions, reduced lifespan, or even pose a safety hazard. Always check the rating label on the back of your DC68 unit for precise details relevant to your specific model. Using a voltage converter may be necessary if your local supply differs.

Water Pressure Specifications

Maintaining appropriate water pressure is vital for the Samsung DC68 washing machine’s effective operation. Insufficient pressure can result in incomplete fills and reduced washing performance, while excessive pressure may cause leaks or damage to internal components.

The DC68 generally requires a water pressure ranging from 0.1 MPa to 1.0 MPa (14.5 PSI to 145 PSI). It’s essential to ensure your home’s water supply falls within this range. If your water pressure is consistently outside these limits, consider installing a pressure regulator. Regularly check the inlet hoses for kinks or obstructions that could restrict water flow. Proper water pressure ensures efficient rinsing and optimal cleaning results.

Dimensions and Weight Details

Understanding the physical specifications of the Samsung DC68 washing machine is crucial for proper installation and space planning. Accurate dimensions ensure the appliance fits comfortably within your laundry area, while weight details are important for moving and servicing.

The DC68 typically measures approximately 600mm (width) x 600mm (depth) x 850mm (height). However, these dimensions can slightly vary depending on the specific model within the DC68 series. The machine’s weight, without packaging, generally falls between 60kg and 70kg. Always refer to the product label or the detailed specifications sheet included with your specific DC68 model for precise measurements and weight information before installation.

Warranty Information

Samsung’s DC68 washing machine warranty covers manufacturing defects for a specified period; contact Samsung support for detailed coverage and claim procedures.

Warranty Coverage Details

The Samsung DC68 washing machine warranty typically covers defects in materials and workmanship under normal household use for one year from the date of purchase. This includes issues with the motor, transmission, and electronic components. Cosmetic damage, however, is generally excluded.

The warranty is void if the appliance has been subjected to misuse, abuse, improper installation, or unauthorized repairs. Proof of purchase is required to make a claim. Samsung may, at its discretion, repair or replace the defective part or appliance.

For specific details regarding the warranty period and coverage for your particular DC68 model, please refer to the warranty card included with your purchase or visit the Samsung website. Extended warranties may also be available for purchase.

Contacting Samsung Support

For assistance with your Samsung DC68 washing machine, several support channels are available. You can visit the official Samsung support website for FAQs, troubleshooting guides, and downloadable manuals. Live chat support is often available for immediate assistance with common issues.

Alternatively, you can contact Samsung’s customer care center via phone. The phone number varies by region, so check the Samsung website for the correct number in your area. When calling, have your model number and serial number readily available.

Samsung also offers support through its mobile app and social media channels. For repair services, you can schedule an appointment with an authorized Samsung service technician online or by phone.

costco egg rolls instructions

Costco Egg Rolls: A Comprehensive Cooking Guide

Embark on a culinary journey! This guide details various methods – oven baking‚ air frying‚ and microwaving – to perfectly prepare your Costco egg rolls‚ ensuring a delightful experience.

Understanding Costco Egg Rolls

Costco egg rolls are a popular frozen appetizer‚ celebrated for their convenience and satisfying flavor. Typically sold in large bulk packages‚ they offer a cost-effective solution for gatherings or quick meals. These egg rolls generally require thorough cooking due to being frozen‚ and several methods exist to achieve optimal results.

Understanding the product itself is key; they are pre-made‚ filled with a savory mixture‚ and encased in a crispy wrapper. Different varieties may exist‚ impacting slight variations in cooking times. Always refer to the package instructions as a primary guide‚ but remember that individual appliances can affect the final outcome. Proper preparation ensures a delicious and safe eating experience.

Types of Costco Egg Rolls Available

Costco frequently stocks Minh Pork Egg Rolls‚ a widely recognized brand known for its quality and taste. These classic egg rolls feature a savory pork filling‚ seasoned with traditional Asian spices. Occasionally‚ Costco introduces limited-edition varieties‚ such as vegetable egg rolls or those with different protein fillings‚ offering consumers expanded choices.

While availability varies by location and season‚ the core offering remains the Minh Pork Egg Roll. It’s crucial to check the packaging‚ as cooking instructions can differ slightly between varieties. Understanding the specific type you’ve purchased ensures you follow the correct preparation method for the best possible crispy and flavorful result. Keep an eye out for new options!

Nutritional Information for Costco Egg Rolls

Understanding the nutritional content of Costco egg rolls is essential for balanced eating. A typical serving (approximately 3 egg rolls) contains around 300-400 calories‚ with a significant portion from carbohydrates and fats. Each serving generally provides 15-20 grams of fat‚ including saturated fats‚ and 30-40 grams of carbohydrates.

Protein content usually ranges from 8-12 grams per serving. Sodium levels can be relatively high‚ often exceeding 500mg per serving‚ so mindful consumption is advised. These values are approximate and can vary based on the specific type of egg roll and any accompanying dipping sauces. Always refer to the packaging for the most accurate nutritional information.

Cooking Methods: A Detailed Breakdown

Explore versatile cooking techniques! We’ll cover oven baking at 375°F‚ air frying for 8-20 minutes‚ and microwaving‚ offering options for every preference and schedule.

Oven Baking Instructions

Achieve golden-brown perfection with oven baking! Begin by Preheating and Preparation: preheat your oven to 375°F (190°C). Arrange the frozen Costco egg rolls in a single layer on a baking sheet‚ ensuring they aren’t overcrowded for even cooking.

Next‚ for Baking Time and Temperature‚ bake for approximately 20 minutes. This initial bake sets the foundation for a crispy exterior.

During Flipping and Final Baking‚ carefully flip the egg rolls halfway through the baking process – around the 10-minute mark – to ensure both sides become uniformly golden and crispy. Continue baking for the remaining time‚ and let them stand for a few minutes before serving.

Preheating and Preparation

Essential first steps for oven-baked success! Begin by preheating your oven to a consistent 375°F (190°C). This ensures even cooking and optimal crispiness. Next‚ carefully arrange the frozen Costco egg rolls on a baking sheet.

Avoid overcrowding; a single layer is crucial for allowing hot air to circulate effectively around each egg roll. Lining the baking sheet with parchment paper isn’t strictly necessary‚ but it simplifies cleanup and prevents sticking.

Ensure the egg rolls aren’t touching to promote even browning. Proper preparation is key to a fantastic result!

Baking Time and Temperature

Achieving golden perfection in the oven! With your oven preheated to 375°F (190°C)‚ carefully place the prepared baking sheet with the egg rolls inside. Bake for approximately 20 minutes initially. This timeframe provides a solid foundation for thorough cooking and developing a desirable golden-brown color.

Consistent temperature is vital; avoid opening the oven door frequently during the baking process. Maintaining a stable heat environment ensures even cooking throughout each egg roll. Monitor closely for desired color and crispness‚ adjusting time slightly if needed.

Flipping and Final Baking

Ensuring even crispness is key! After the initial 20 minutes of baking at 375°F (190°C)‚ carefully remove the baking sheet from the oven. Using tongs‚ gently flip each egg roll to expose the uncooked side to the direct heat. This crucial step guarantees uniform browning and prevents any part from becoming overly soft or undercooked.

Return the flipped egg rolls to the oven and continue baking for another 5-10 minutes. Monitor closely‚ aiming for a deep golden-brown color and a satisfyingly crispy exterior. Remove and let cool slightly before serving for optimal enjoyment.

Air Fryer Instructions

Achieve ultimate crispiness with your air fryer! This method delivers remarkably crunchy egg rolls in a fraction of the time compared to oven baking. Begin by preheating your air fryer to 375°F (190°C) for optimal results. Arrange the frozen egg rolls in a single layer within the air fryer basket‚ ensuring they aren’t overcrowded to allow for proper air circulation.

Cooking time typically ranges from 15 to 20 minutes‚ but remember to flip the egg rolls halfway through to promote even cooking and browning. This simple step ensures a consistently delicious outcome every time.

Optimal Air Fryer Settings

For consistently perfect results‚ utilize a temperature of 375°F (190°C) within your air fryer. This setting strikes an ideal balance‚ ensuring the egg rolls cook thoroughly while achieving a satisfyingly crispy exterior. Avoid exceeding this temperature‚ as it may lead to burning before the interior is heated through.

Regarding power settings‚ most air fryers perform effectively at their default power level for frozen foods like egg rolls. Preheating is crucial; allow the air fryer to fully heat up before adding the egg rolls for even cooking. Proper air circulation is key‚ so avoid overcrowding the basket.

Cooking Time and Flipping

Achieve golden-brown perfection by air frying your Costco egg rolls for approximately 8 to 15-20 minutes‚ depending on your air fryer model and desired crispiness. A crucial step is flipping the egg rolls halfway through the cooking process – around the 4-8 minute mark. This ensures even heat distribution and prevents one side from becoming overly browned while the other remains pale.

Monitor closely during the final minutes to prevent burning. After cooking‚ allow the egg rolls to rest for a couple of minutes before serving‚ enhancing their texture and preventing accidental burns.

Achieving Crispy Results

For ultimate crispiness‚ ensure your air fryer isn’t overcrowded; work in batches if necessary. Overcrowding steams the egg rolls instead of frying them‚ resulting in a softer texture. Preheating your air fryer is also vital – a hot surface immediately begins the crisping process. Consider lightly spraying the egg rolls with oil before air frying; this promotes even browning and enhances the crunch.

Don’t skip the flipping step! It’s key to even cooking. Finally‚ a short resting period after cooking allows the exterior to firm up‚ delivering that satisfying crunch with every bite.

Microwave Instructions

Microwaving is the quickest option‚ but compromises on crispiness. For three egg rolls (using an 1100-watt microwave)‚ heat for 13 to 14 minutes. Remember to flip the egg rolls halfway through the cooking process to promote more even heating. It’s crucial to let them stand for approximately three minutes post-heating; this allows internal temperature equalization and a slight textural improvement.

Be aware that microwaving will result in a softer‚ less crispy egg roll. Consider pairing with a flavorful dipping sauce to compensate for the lack of texture. Always exercise caution‚ as the egg rolls and the tray will be hot!

Microwave Power Levels

Optimal microwave power is key for successful egg roll reheating. While instructions often assume 1100 watts‚ adjustments are needed for varying microwave strengths. Lower wattage microwaves (700-800 watts) will require extended cooking times – potentially adding 3-5 minutes to the recommended 13-14 minute timeframe. Conversely‚ higher wattage models (1200+ watts) may need slightly reduced cooking times to prevent overheating.

Always monitor the egg rolls closely during the process. It’s better to undercook slightly and add additional 30-second intervals than to overcook and end up with a rubbery texture. Consistent checking ensures a palatable result.

Cooking Time for Different Quantities

Adjusting microwave time based on the number of egg rolls is crucial for even heating. Instructions frequently cite a cooking time for approximately three egg rolls. For smaller portions – one or two rolls – reduce the initial cooking time to around 8-10 minutes‚ then check for desired warmth;

Larger batches‚ exceeding five egg rolls‚ will necessitate increased cooking time‚ potentially extending to 16-18 minutes. Staggering the egg rolls slightly can also promote more uniform heating. Remember to always flip the rolls halfway through and allow a 3-minute standing period post-heating.

Considerations for Texture

Microwaving inherently compromises the crispy texture of egg rolls. To mitigate this‚ place a paper towel underneath the rolls to absorb excess moisture during heating. Avoid overcrowding the microwave‚ as this can lead to steaming rather than heating. For a slightly improved texture‚ briefly air fry the microwaved egg rolls for 2-3 minutes.

Understand that microwaving prioritizes speed over achieving the ideal crispy exterior. If crispiness is paramount‚ oven baking or air frying are strongly recommended. The microwave is best suited when time is limited and texture is less of a concern.

Tips for the Best Results

Maximize your egg roll enjoyment! Achieving optimal crispiness‚ preventing sticking‚ and ensuring safe internal temperatures are key to a perfect cooking outcome.

Achieving Maximum Crispiness

For exceptionally crispy Costco egg rolls‚ several techniques prove invaluable. When oven baking‚ ensure the egg rolls are arranged in a single layer on a baking sheet‚ avoiding overcrowding which can steam them instead of crisping. Utilizing an air fryer is highly recommended; its circulating hot air delivers superior results.

Preheating the air fryer thoroughly is crucial‚ and flipping the egg rolls halfway through the cooking process guarantees even browning and texture. Regardless of the method‚ a slightly higher temperature – around 375°F – encourages optimal crispness. Allowing the egg rolls to rest for a few minutes post-cooking further enhances their texture‚ as the internal moisture redistributes.

Preventing Egg Rolls from Sticking

To avoid frustrating sticking issues when cooking Costco egg rolls‚ preparation is key. When oven baking‚ lightly grease the baking sheet with cooking spray or line it with parchment paper. This creates a non-stick barrier‚ ensuring easy removal. Air fryers also benefit from a light coating of oil spray within the basket before adding the egg rolls.

Avoid overcrowding‚ as this increases the likelihood of sticking. If microwaving‚ use a microwave-safe plate and consider placing a paper towel underneath to absorb excess moisture. Allowing a brief resting period after cooking can also help loosen the egg rolls‚ making them easier to handle and serve without breakage.

Safe Handling and Internal Temperature

Prioritizing food safety is crucial when preparing Costco egg rolls. Always handle raw or cooked egg rolls with clean utensils and wash your hands thoroughly before and after preparation. Ensure the egg rolls are cooked to an internal temperature of 165°F (74°C) to eliminate any potential bacteria.

While typically pre-cooked‚ reheating still requires reaching this temperature. Use a food thermometer to verify. Be cautious of steam when opening cooked egg rolls‚ as the filling can be very hot. Allow a short cooling period before serving to prevent burns. Proper handling and thorough cooking guarantee a safe and enjoyable experience.

Serving Suggestions & Pairings

Elevate your meal! Pair these crispy Costco egg rolls with flavorful dipping sauces and complementary side dishes for a complete and satisfying dining experience.

Dipping Sauces for Costco Egg Rolls

Unlock a world of flavor! The right dipping sauce can transform your Costco egg roll experience. Classic sweet chili sauce provides a balanced sweetness and gentle heat‚ a universally loved option. For those craving zest‚ a vibrant plum sauce offers a fruity tang.

Soy sauce‚ perhaps mixed with a dash of rice vinegar and sesame oil‚ delivers a savory umami punch. Explore bolder choices like sriracha mayo for a creamy kick‚ or a peanut sauce for rich‚ nutty notes. Don’t hesitate to experiment – a simple ginger-garlic sauce can also be incredibly satisfying. Ultimately‚ the best sauce is the one that tantalizes your taste buds!

Side Dishes to Complement Egg Rolls

Elevate your meal! Costco egg rolls pair beautifully with a variety of sides‚ creating a complete and satisfying dining experience. A fresh‚ vibrant Asian slaw‚ with its crunchy texture and tangy dressing‚ offers a delightful contrast. Steamed or stir-fried vegetables‚ like broccoli or snap peas‚ provide a healthy and colorful addition.

For a heartier meal‚ consider a side of fried rice or lo mein noodles. A simple cucumber salad‚ lightly seasoned with vinegar and sesame oil‚ offers a refreshing palate cleanser. Don’t underestimate the power of a light miso soup to balance the richness of the egg rolls. These sides enhance‚ not overshadow‚ the main attraction!

Serving Size Recommendations

Planning your feast! Determining the right serving size for Costco egg rolls depends on whether they’re an appetizer or a main course. As an appetizer‚ 3-4 egg rolls per person generally suffice‚ allowing room for other dishes. If serving as a main course‚ increase this to 5-6 egg rolls‚ alongside complementary sides like rice and vegetables.

Consider your guests’ appetites; some may enjoy a larger portion! A standard package of Costco egg rolls contains a substantial quantity‚ making it ideal for gatherings. Remember to factor in dipping sauces‚ as these contribute to the overall satisfaction. Adjust quantities based on the number of attendees for a perfectly balanced meal.

Troubleshooting Common Issues

Don’t despair! Encountering issues? We’ll address common problems like undercooked centers‚ soggy textures‚ or burning‚ offering solutions for perfectly cooked Costco egg rolls.

Egg Rolls Not Cooking Through

Addressing the uncooked center dilemma is crucial. If your Costco egg rolls are golden brown on the outside but still cold inside‚ several factors might be at play. Often‚ the oven or air fryer temperature isn’t sufficiently high enough‚ or the cooking time is simply too short.

Ensure your oven reaches a consistent 375°F (190°C) or your air fryer is properly preheated. Extending the cooking time by a few minutes‚ while carefully monitoring for burning‚ can resolve this. For larger quantities‚ consider reducing the number of egg rolls cooked simultaneously to promote even heat distribution.

If microwaving‚ ensure you’re using the recommended power level and time‚ and rotate the egg rolls midway through for more uniform heating. Remember‚ microwaves cook from the outside in‚ so longer times are often necessary.

Egg Rolls Becoming Soggy

Battling sogginess is key to enjoying crispy egg rolls! A common issue is overcrowding the cooking surface‚ whether in the oven‚ air fryer‚ or even during cooling. This traps steam‚ leading to a less-than-ideal texture. Ensure adequate space between each egg roll for proper air circulation during cooking.

Avoid covering the egg rolls while they cool after cooking‚ as this also traps moisture. If using the microwave‚ be aware it inherently produces softer results. For optimal crispness‚ oven baking or air frying are strongly recommended.

Finally‚ promptly remove cooked egg rolls from the cooking appliance to prevent continued exposure to heat and steam.

Egg Rolls Burning

Preventing burnt egg rolls requires careful attention to temperature and timing! While achieving a golden-brown crispness is desirable‚ exceeding recommended cooking times or temperatures can quickly lead to burning. Always adhere to the suggested baking or air frying times – typically around 15-20 minutes at 375°F‚ flipping halfway through.

Regularly check the egg rolls’ progress‚ especially towards the end of the cooking cycle. If browning occurs too rapidly‚ reduce the temperature slightly. Be mindful that air fryers can cook more quickly than conventional ovens.

For microwave cooking‚ shorter intervals are crucial to avoid scorching.

suspension training exercises pdf

Suspension training offers a versatile workout, utilizing bodyweight and straps for strength and flexibility gains. Numerous PDF guides detail exercises,

assessments, and program designs for all fitness levels.

These resources, including those from the TRX official site, showcase how to maximize muscle gains and functional strength through this innovative system.

What is Suspension Training?

Suspension training is a revolutionary fitness system that leverages gravity and your bodyweight to develop strength, balance, flexibility, and core stability. Unlike traditional exercises relying on external weights, it utilizes adjustable straps anchored to a secure point.

PDF guides, readily available online – including those from TRX’s official website and supplemental materials – are invaluable resources for understanding the core principles. These documents illustrate how to modify exercise intensity simply by altering your body angle, making it suitable for beginners to advanced athletes.

The system’s versatility allows for a full-body workout, targeting multiple muscle groups simultaneously. Suspension training exercises PDF resources often include detailed instructions, visual demonstrations, and progressive programs to guide users safely and effectively.

Benefits of TRX Suspension Training

TRX Suspension Training delivers a multitude of benefits, enhancing overall fitness through a unique, full-body approach. It improves core strength, stability, and flexibility simultaneously, promoting functional movement patterns applicable to everyday life.

Accessing suspension training exercises PDF guides unlocks a pathway to personalized workouts. These resources detail how to adjust intensity, catering to all fitness levels and aiding in injury prevention programs. The system’s adaptability allows for progressive overload, continually challenging muscles.

Furthermore, TRX training enhances proprioception – your body’s awareness in space – and improves balance. PDF materials often include assessments to track progress and optimize training routines for strength, power, and agility gains.

TRX Equipment and Setup

TRX Suspension Trainers are portable and versatile. PDF setup guides detail proper anchoring and strap adjustment for safe, effective execution of various exercises.

Understanding the TRX Suspension Trainer

The TRX Suspension Trainer is a remarkably adaptable fitness tool, distinguished by its use of bodyweight and gravity to deliver a full-body workout. Unlike traditional weightlifting, the TRX leverages your own resistance, making it suitable for all fitness levels.

Central to understanding the system is recognizing its core components: two adjustable straps, foot and hand cradles, and a durable anchor. Many PDF resources, including the TRX PRO Guide, provide detailed diagrams and explanations of these parts.

These guides emphasize the trainer’s ability to modify exercise intensity simply by altering your body angle. The system’s portability is another key feature, allowing for workouts virtually anywhere a secure anchor point exists. Exploring available suspension training exercises PDF materials will reveal the trainer’s versatility and potential.

Proper TRX Setup and Anchoring

Secure anchoring is paramount when using a TRX Suspension Trainer, ensuring both safety and workout effectiveness. Always inspect the anchor point – whether a door, beam, or dedicated TRX mount – for stability before each session. PDF guides, like the TRX Setup Guide, detail appropriate anchor heights and weight limits.

Proper setup involves correctly threading the straps through the anchor and verifying the buckles are securely fastened. Understanding different anchoring methods is crucial; door anchors require specific door frame construction.

Many suspension training exercises PDF resources highlight the importance of a stable base. Incorrect setup can lead to equipment failure and potential injury. Prioritize safety by diligently following the manufacturer’s instructions and consulting available guides.

Adjusting Strap Length for Different Exercises

Strap length dramatically alters exercise intensity and muscle engagement in TRX training. Shorter straps increase difficulty, requiring greater strength and stability, while longer straps reduce resistance, ideal for beginners or higher repetitions. Suspension training exercises PDF guides often illustrate optimal strap lengths for each movement.

Understanding how to adjust the straps efficiently is key to progressive overload. The TRX PRO Guide PDF provides detailed instructions on adjusting for various exercises, from chest presses to rows.

Experimentation is encouraged, but always prioritize controlled movements. Many resources emphasize that proper form is more important than minimizing strap length. Consult PDF resources to ensure correct technique and maximize workout benefits;

Fundamental TRX Exercises

TRX foundational movements—chest press, rows, squats, and push-ups—build core strength and stability. Suspension training exercises PDF guides detail proper form and progressions.

TRX Chest Press

The TRX Chest Press is a fundamental exercise targeting the pectoral muscles, anterior deltoids, and triceps, utilizing bodyweight and the suspension trainer. Suspension training exercises PDF resources often highlight this as a beginner-friendly yet effective movement.

To perform, maintain a plank position with hands gripping the TRX handles, lean forward, and lower your chest towards the anchors while keeping your body straight. Push back to the starting position, engaging your chest muscles.

PDF guides emphasize maintaining core engagement throughout the exercise to prevent lower back arching. Adjusting strap length alters the difficulty; shorter straps increase the challenge. Proper form, as demonstrated in visual guides, is crucial for maximizing benefits and minimizing injury risk. This exercise builds upper body strength and stability.

TRX Rows

TRX Rows are a cornerstone exercise for building back strength and improving posture, utilizing the suspension trainer’s unique resistance. Many suspension training exercises PDF guides feature this exercise prominently, often demonstrating progressions for varying fitness levels.

Begin by facing away from the anchor point, gripping the handles with palms facing each other. Lean back, maintaining a straight line from head to heels, and pull your chest towards the handles, squeezing your shoulder blades together.

PDF resources stress maintaining core stability and avoiding excessive swinging. Adjusting your body angle controls the difficulty; the more horizontal you are, the harder the exercise. Visual guides illustrate proper form, emphasizing controlled movements for optimal results and injury prevention. This builds a strong back and improves overall upper body strength.

TRX Squats

TRX Squats elevate the traditional squat by adding instability, engaging core muscles and improving functional strength. Numerous suspension training exercises PDF guides detail proper form and progressions for this effective exercise. Begin facing the anchor point, holding the handles at shoulder height.

Squat down, keeping your back straight and chest up, while maintaining tension in the straps. The TRX assists with balance and encourages proper squat depth. PDF resources often highlight the importance of controlled descent and ascent, avoiding knee valgus (knees caving in).

Adjusting strap length modifies the difficulty; shorter straps increase the challenge. Visual guides demonstrate the correct body alignment and emphasize core engagement throughout the movement, building lower body strength and stability.

TRX Push-Ups

TRX Push-Ups introduce a dynamic instability to the classic push-up, significantly increasing muscle activation, particularly in the core and stabilizing muscles. Many suspension training exercises PDF guides illustrate variations and progressions for all fitness levels. Start in a plank position, hands in the foot cradles.

Lower your chest towards the straps, maintaining a straight line from head to heels. The unstable surface demands greater core engagement to prevent rotation. PDF resources emphasize controlled movements and proper form to maximize effectiveness and minimize risk of injury.

Adjusting foot position alters the difficulty; further feet increase the challenge. Visual guides demonstrate correct body alignment and highlight the importance of maintaining a tight core throughout the exercise, building upper body strength and stability.

Intermediate TRX Exercises

Intermediate TRX exercises build upon foundational movements, demanding greater strength and control. PDF guides offer detailed instructions and progressions for exercises like bicep curls and lunges.

TRX Bicep Curls

TRX Bicep Curls are an excellent intermediate exercise for isolating and strengthening the biceps. Utilizing bodyweight and the suspension trainer, this exercise provides a unique challenge to traditional bicep curls;

To perform a TRX Bicep Curl, begin by standing facing away from the anchor point, holding the TRX handles with palms facing upwards. Lean back, maintaining a straight line from head to heels. Keeping your elbows high and close to your ears, curl your body upwards by contracting your biceps.

PDF guides often demonstrate proper form, emphasizing controlled movements and avoiding swinging. These resources highlight the importance of maintaining core engagement throughout the exercise. Adjusting your body angle alters the difficulty; the more upright you are, the easier the curl becomes. Numerous suspension training exercises PDF resources provide visual aids and step-by-step instructions for mastering this effective exercise.

TRX Tricep Extensions

TRX Tricep Extensions effectively target the triceps, building strength and definition. This intermediate exercise utilizes bodyweight and the suspension trainer for a challenging and versatile workout.

Begin by facing the anchor point, gripping the TRX handles with an overhand grip. Extend your arms forward, leaning your body forward while maintaining a straight back. Keeping your elbows close to your head, extend your arms, contracting your triceps to return to the starting position.

Suspension training exercises PDF guides often emphasize controlled movements and proper form. They illustrate how adjusting your body angle impacts the exercise’s difficulty. Leaning further forward increases the challenge. Many PDF resources provide detailed instructions and visual aids, ensuring correct execution and maximizing results. These guides are invaluable for both beginners and experienced users.

TRX Lunges

TRX Lunges are an excellent intermediate exercise for developing lower body strength, balance, and stability. Utilizing the suspension trainer adds an extra challenge, engaging core muscles for enhanced control.

Start by facing away from the anchor point, holding the TRX handles for support. Step forward into a lunge position, keeping your front knee aligned over your ankle and your back knee hovering just above the ground. Maintain a straight back and engaged core throughout the movement. Return to the starting position and repeat on the other leg.

Suspension training exercises PDF guides frequently detail modifications for varying fitness levels. They often include visual demonstrations and emphasize the importance of controlled movements. Accessing these PDF resources can help refine technique and prevent injury, ensuring a safe and effective workout.

TRX Plank

TRX Planks significantly amplify the traditional plank, demanding greater core engagement and stability. By placing your feet in the TRX straps, you introduce an unstable surface, forcing your body to work harder to maintain proper form.

Assume a plank position with your feet secured in the foot cradles. Ensure your body forms a straight line from head to heels, actively squeezing your glutes and drawing your navel towards your spine. Hold this position for as long as possible, maintaining controlled breathing.

Many suspension training exercises PDF guides illustrate proper plank technique and offer progressions. These PDF resources often highlight common mistakes and provide modifications for beginners, making this exercise accessible and safe for all levels.

Advanced TRX Exercises

Advanced TRX exercises, detailed in suspension training exercises PDF guides, challenge strength and stability. These movements require significant core control and proper form.

TRX Pike

The TRX Pike is an advanced exercise targeting the shoulders, core, and upper back, often found detailed within comprehensive suspension training exercises PDF guides. This movement mimics a pike position in gymnastics, demanding significant core stabilization to prevent excessive strain on the lower back.

To perform it, anchor your feet in the TRX straps and assume a plank position. Keeping your back straight and core engaged, lift your hips towards the ceiling, forming an inverted V-shape with your body. Control is paramount; avoid swinging or using momentum.

PDF resources often emphasize proper form to maximize effectiveness and minimize injury risk. Modifications include reducing the range of motion or performing the exercise with bent knees for beginners. Mastering the TRX Pike builds functional strength and improves overall body control.

TRX Single Leg Squats

TRX Single Leg Squats are a challenging, advanced exercise detailed in many suspension training exercises PDF guides, focusing on unilateral leg strength, balance, and core stability. This exercise significantly increases the difficulty of a traditional squat by removing one leg’s support.

Begin by anchoring your foot in the TRX straps and extending the other leg straight out in front. Slowly lower your body as if performing a single-leg squat, maintaining a straight back and engaged core. The TRX provides assistance and balance, but requires substantial effort.

PDF resources often highlight the importance of controlled movement and proper form. Beginners can modify by decreasing the squat depth or using a slight assist from the free leg. This exercise builds functional strength and improves proprioception.

TRX Atomic Push-Ups

TRX Atomic Push-Ups represent a highly advanced exercise frequently illustrated in comprehensive suspension training exercises PDF guides. This dynamic movement combines a push-up with a tuck, intensely engaging the core, shoulders, and chest. It demands significant strength, coordination, and stability.

Begin in a plank position with your feet secured in the TRX straps. Perform a standard push-up, and as you push up, draw your knees towards your chest, creating a tucked position. Extend your legs back to the starting plank before repeating.

PDF resources emphasize maintaining a stable core throughout the exercise. Modifications for beginners include performing the push-up portion separately or reducing the tuck range of motion. This exercise builds explosive power and core endurance.

TRX Workout Programs & Guides

TRX programs, often detailed in suspension training exercises PDF guides, range from circuit training to specialized routines for strength, power, flexibility, and injury prevention.

Creating a TRX Circuit Training Routine

Designing a TRX circuit leverages the system’s versatility for a full-body workout. Many suspension training exercises PDF guides provide pre-designed circuits, but customization is key.

Begin by selecting 6-10 exercises – incorporating TRX Chest Press, Rows, Squats, and Plank variations. Set a timer for 30-60 seconds per exercise, followed by 15-30 seconds of rest. Complete 2-3 rounds, adjusting exercise difficulty based on fitness level.

PDF resources often suggest incorporating assessments to gauge progress. Focus on maintaining proper form throughout each exercise to maximize effectiveness and minimize injury risk. Remember to warm up before and cool down after your circuit!

Consider alternating upper and lower body movements for a balanced routine. Progress by increasing repetitions, reducing rest, or choosing more challenging exercise variations.

TRX for Strength and Power

TRX training excels at building both strength and power due to its unstable environment, forcing constant muscle engagement. Numerous suspension training exercises PDF guides detail progressions for maximizing these benefits.

Focus on explosive movements like TRX Jump Squats, or powerful TRX Rows with a controlled eccentric phase. Utilize advanced exercises like TRX Atomic Push-Ups to combine strength and plyometrics. Adjust strap length to increase or decrease the challenge.

PDF resources often highlight the importance of core stabilization for power transfer. Prioritize exercises that challenge core strength alongside major muscle groups. Remember proper form is crucial to prevent injury during high-intensity movements.

Incorporate TRX into circuit training for enhanced power endurance. Progressive overload – increasing resistance or repetitions – is key for continued strength gains.

TRX for Flexibility and Stability

TRX Suspension Training significantly enhances both flexibility and stability by requiring constant core engagement and controlled movements. Many suspension training exercises PDF guides emphasize exercises targeting these areas.

Exercises like TRX Hamstring Curls and TRX Chest Stretch improve range of motion. The unstable nature of the straps forces stabilizing muscles to activate continuously, improving joint health. Focus on slow, controlled movements to maximize the stretch and stability benefits.

PDF resources often include assessments to gauge flexibility and stability levels. Incorporate TRX into injury prevention programs, strengthening supporting muscles.

Utilize the straps to deepen stretches and challenge balance. Remember to listen to your body and avoid pushing beyond your comfortable range of motion.

Resources and Further Learning

TRX offers official website training materials, alongside numerous PDF exercise guides and plans. Explore these resources to deepen your understanding and technique.

TRX Official Website and Training Materials

TRX Training’s official website serves as a central hub for comprehensive resources, including detailed PDF guides on suspension training exercises. These materials are designed to cater to all fitness levels, from beginners taking their first steps to seasoned athletes seeking advanced challenges.

You’ll find downloadable exercise guides, showcasing proper form and technique through full-color photos, as highlighted in the “Complete Guide to TRX Suspension Training.” The site also provides access to fitness assessments, allowing users to gauge their current level and track progress effectively.

Furthermore, TRX offers PDFs outlining specific training procedures, like the “TRX Six Procedures PDF,” and the “TRX PRO Guide PDF,” providing structured workout routines and expert insights. These resources are invaluable for maximizing the benefits of TRX suspension training and achieving optimal results.

Finding TRX Exercise PDFs and Guides

Beyond the TRX official website, a wealth of PDF exercise guides and resources are readily available online. Many fitness websites and blogs curate collections of TRX exercises, often presenting them in downloadable PDF format for easy access and offline use.

Searching for terms like “TRX Setup Guide PDF” or “TRX Exercise Guide PDF” will yield numerous results, offering variations in exercise selection and program design. These guides frequently include detailed instructions and visual demonstrations, ensuring proper form and technique.

Remember to evaluate the source’s credibility before relying on any external PDF. Prioritize resources from certified trainers or reputable fitness organizations to guarantee accuracy and safety. Utilizing these readily available PDFs can significantly enhance your TRX training experience.